
How to add a Payment Account in Xero
Connecting Xero to B2Bpay and there is nothing to select under Payment Account? Your bank account in Xero needs an account code. Here is how to add one, step by step.
Why is there no Payment Account to select?
Short answer: B2Bpay can only list Xero accounts that have an account code. If the Payment Account list is empty, give the bank account you receive funds into a 3-digit code in Xero's chart of accounts (or add a bank account with a code), then refresh the page in B2Bpay.
When you connect Xero to B2Bpay, you are asked to choose a Payment Account. Some customers find there is nothing in the list to select, like the example below.

To fix it, go to your Xero account and either add a code to your existing bank account (the account where you receive funds) or add a bank account with a 3-digit code. The three steps below take a few minutes.
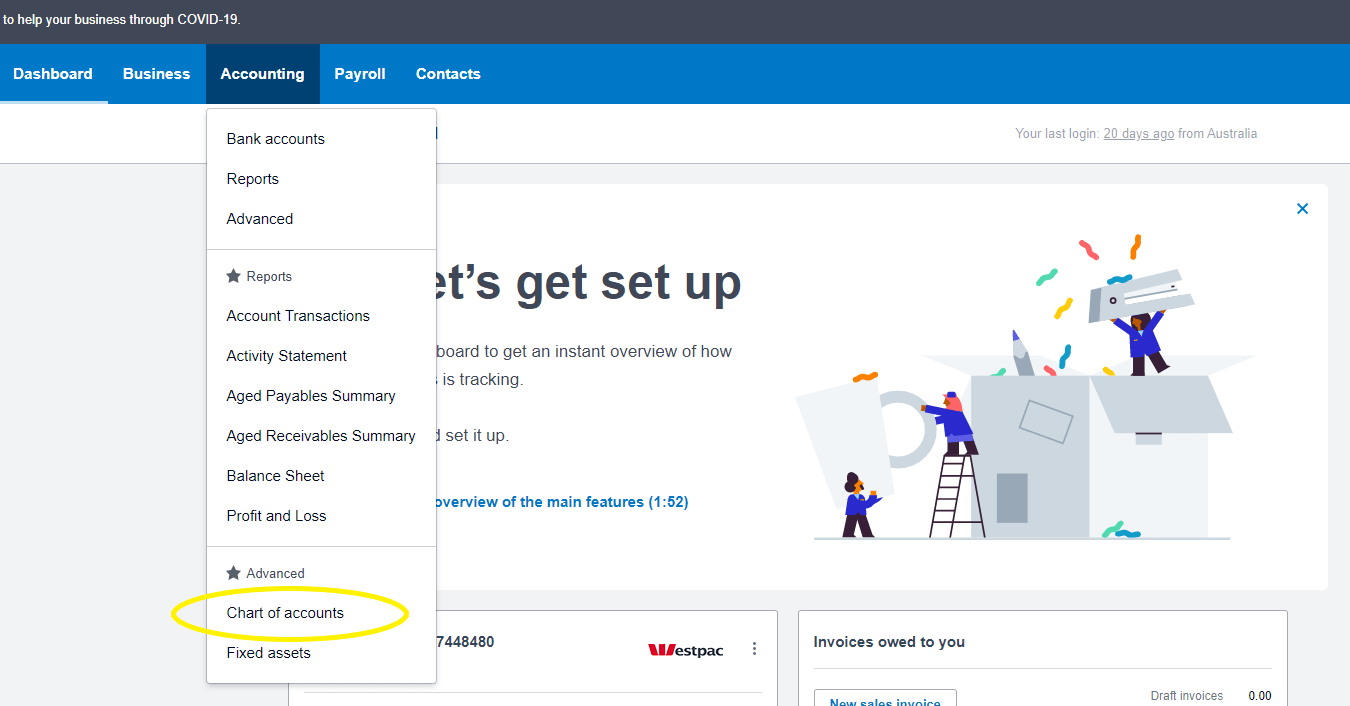
Open your chart of accounts in Xero
- Log in to your Xero account.
- Click the Accounting tab.
- Click Chart of accounts.
Add a 3-digit code to your bank account
In your chart of accounts you will usually see your bank account listed (the account funds are deposited into when you receive payments). If you can see it, follow these steps. If no bank account is listed, skip to Step 3.
- Click on your bank account in the chart of accounts.
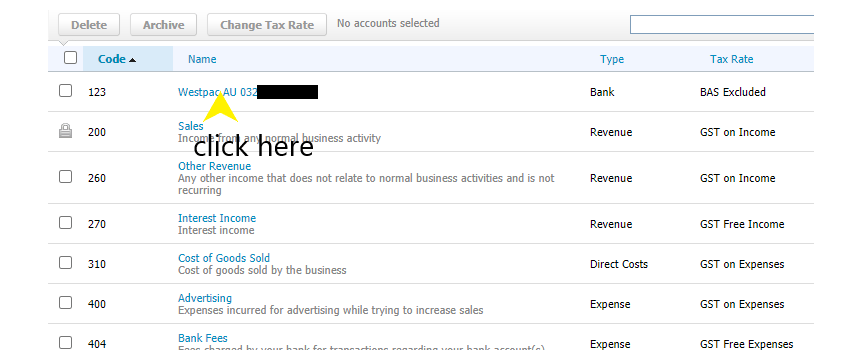
Click the bank account to open its details. - A pop-up box opens where you can edit the account. In the Code field, type a 3-digit number. It can be any number, as long as it is not already used by another account in your chart of accounts.
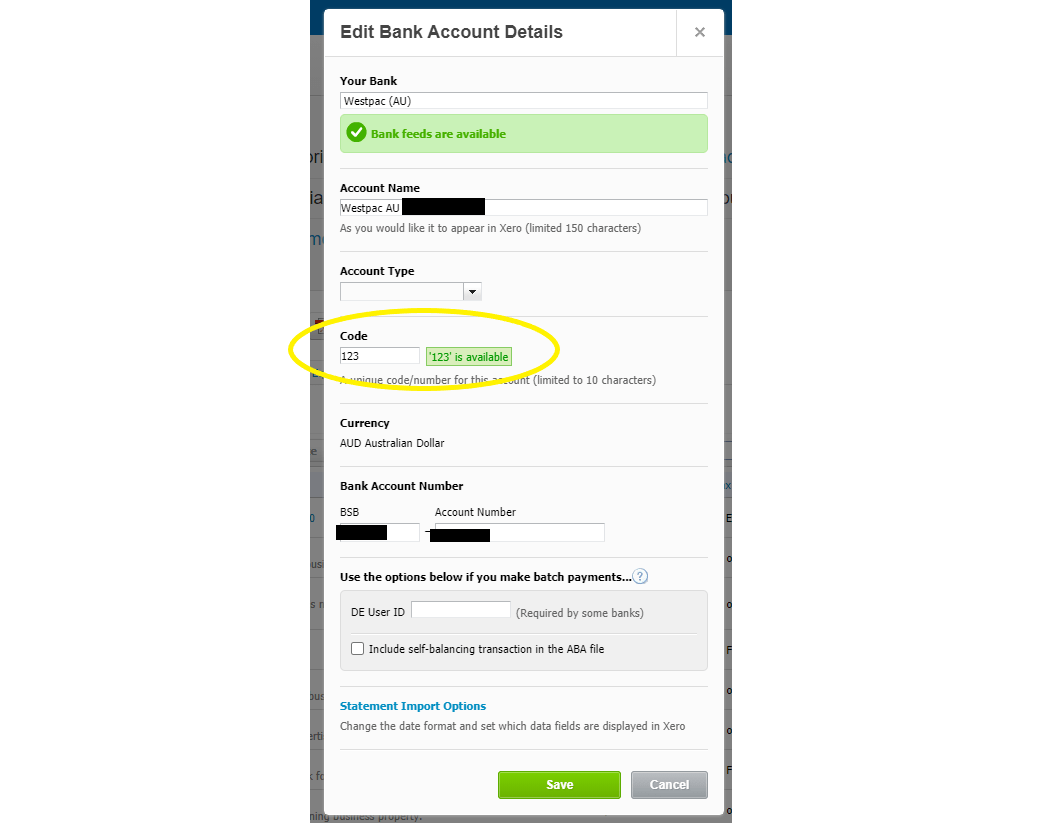
Enter a unique 3-digit code in the Code field. - Click Save.
- Return to B2Bpay, where you are configuring your Xero connection, and refresh the page. Your bank account now appears and you can select it as your Payment Account.

After refreshing, the bank account is available to select in B2Bpay.
No bank account listed? Add one to Xero
If your chart of accounts does not show a bank account, you need to add one to Xero first.
- Click the + Add Bank Account button.

The + Add Bank Account button in Xero. - Follow the prompts to add your bank account. Xero has detailed instructions on adding a bank account.
- Once the bank account is added, refresh the page in your B2Bpay dashboard. You should now be able to select it as your Payment Account.
- Still can't see it? The new account may not have a code yet. Follow Step 2 to add a 3-digit code, then refresh B2Bpay again.
Need a hand? Our Australian-based team can walk you through the Xero setup.
Frequently asked questions
Why doesn't my Xero bank account appear as a Payment Account in B2Bpay?
B2Bpay lists Xero accounts that have an account code. If your bank account has no code, it will not appear. Add a 3-digit code to it in Xero's chart of accounts, save, and refresh the page in B2Bpay.
What code should I use?
Any 3-digit number, as long as it is not already used by another account in your Xero chart of accounts.
I added the code but the account still isn't showing. What now?
Make sure you clicked Save in Xero, then refresh the page in B2Bpay where you are configuring your Xero connection. If you have just added a new bank account, check it has a 3-digit code (Step 2).
What if I don't have a bank account in Xero at all?
Add one using the + Add Bank Account button in your chart of accounts and follow Xero's prompts, then refresh your B2Bpay dashboard and select it as your Payment Account.
Pay your Xero bills by card and earn points
Connect Xero once, then pay approved bills from one screen and have every payment recorded automatically.